This project is a custom-made stick pin depicting a coyote howling at the moon. There will be a diamond in the eye and a small flame of gold by the tail.
To make this project, you will need:
Platinum sheet stock, 15x25x1mm.

Platinum wire, 0.8mmx50 mm long,
Platinum solder, medium,
14K yellow gold sheet stock10x15x.8mm,
14K yellow hard solder.
A round brilliant diamond, 0.08 ct
It is assumed that you have a functional work-bench with a soldering station. Be aware that Acetylene/Oxygen is not suitable for working with platinum.
Using the torch, the platinum stock is annealed. Annealing takes place at about 900C with the metal being bright orange for about 1 minute.

Using a provided picture tile as the design base, the outline of the coyote is drawn onto the platinum stock. By using a permanent marker to blacken a rough outline, the exact detail is easily seen and can be pierced .To pierce the detail, some drilling is necessary for the saw blade to pass through

The entire design is now being pierced. A piercing vice is a helpful tool to hold the platinum during piercing.

The saw blade is then threaded through the drilled holes and details are also pierced.

Using a wooden block, a dapping tool and a chasing hammer, the back of the pin is slightly domed, This will give it the 3-dimentional look desired. The purity stamp as well as the makers mark are stamped at this time as well

After the doming, the pin is turned over, and some additional detail is chased, by using a punch and a hammer. This will define the low and high areas a little better

At this point the pin is ready for carving. This can be done with assorted burrs as well as gravers. I prefer the burr method, as it saves time. Using an inverted cone burr, The body detail is created. This burr is actually well suited to do the overall shaping and detailing
Using an abrasive wheel, the saw marks are smoothed away and the overall shape of the pin is stream lined.

Using the same wheel all scratches and marks are being removed as the back of the design is cleaned.

The actual pin is now being soldered in place. As the pin is soldered with medium platinum solder, the gold trim will need to be installed after this operation.

A prepared piece of yellow gold is being soldered in place, using hard yellow gold solder.
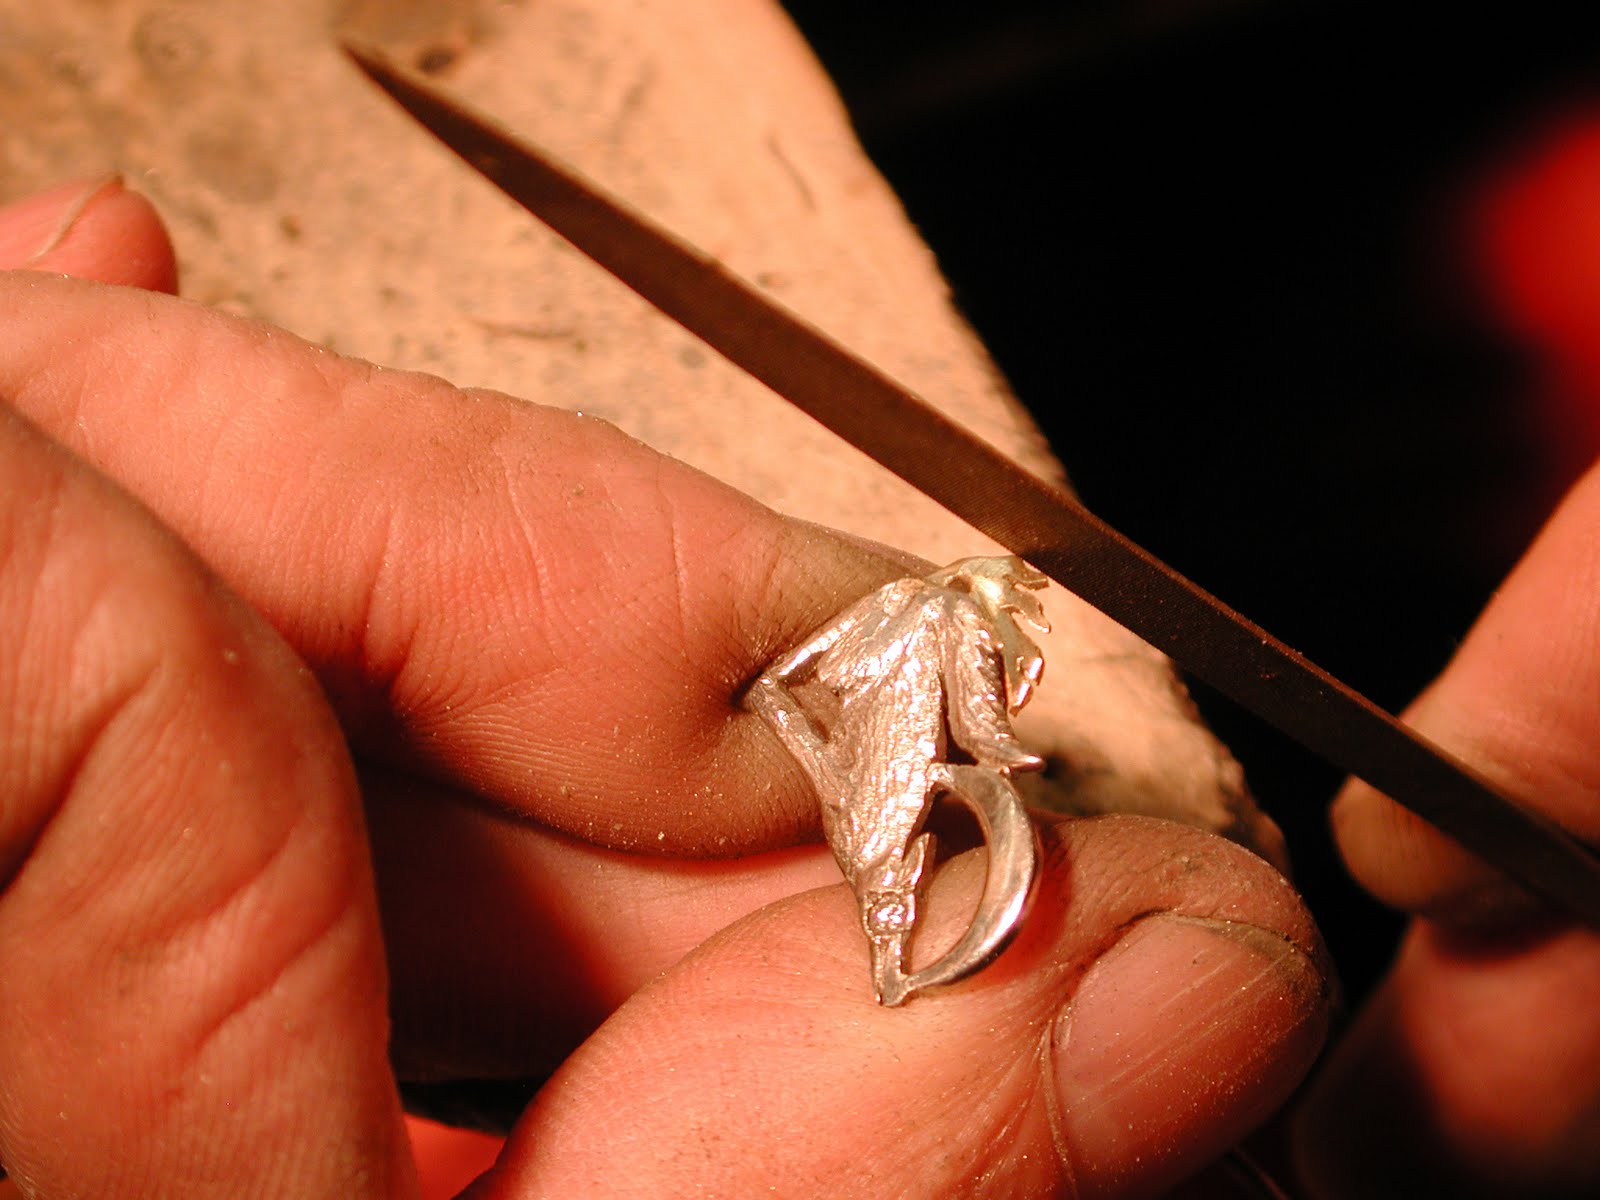
Using a saw and then a small needle file, the trim is shaped to represent flames.
There is a hole all the way through the bench pin, where the pin is being inserted so that the stone can be set. It was necessary to solder the pin first, as the diamond would be burned otherwise.Using a drill, a small hole is drilled in the coyote head, to be used for the setting of the diamond. This hole is then reamed to the proper size and the diamond seat is made with a stone setting burr, selected for the diamond size at hand.

Using a graver, two beads are being raised , securing the diamond. A beading tool is used to shape the beads.
The stickpin is then polished, cleaned and ready for delivery. A pin clutch may be added to secure the stick pin to clothing.
No comments:
Post a Comment