ABSTRACT
It has often been a challenge for the jeweler at the bench to work with Platinum. The high temperatures used in soldering and welding can make even simple jobs difficult. Using a laser, makes it possible to size a platinum ring while holding it in your hand. Complex fabricating tasks become simple and fun to do. This paper will show assembly, repair and the creation of beautiful platinum jewelry using laser welders. Complex welding is done in close proximity of pearls and stones without fear of damage. Using a laser to perform these tasks is the natural solution to many challenges the bench jeweler or manufacturer faces everyday.
KEYWORDS
Platinum, LASER, welding, repair, fabrication, complex fabrication, challenge, techniques
INTRODUCTION
When I was first introduced to a LASER a few years back, I thought a dream came true. Here was a machine that would allow one to work on jewelry without fear of destroying stones, enamel or thin wires or prongs. I was
totally mesmerized watching a ring being sized while it was held in the hand. I then found out that Platinum was actually especially well suited for the laser as its thermal properties are unique and they work especially well. It was somewhat disappointing to see that many companies use a laser for filling porosity in bad castings and do mediocre repairs. To me a laser is likened to a Microwave oven. It can be used to cook a gourmet meal or to heat water for tea.
This presentation is designed to show the gourmet side, rather than the tea water side. So I picked several projects to illustrate the capability of a laser when used in many different situations designed to show that a laser is truly the natural solution to many problems facing the platinum smith or bench jeweler. Since no torch is being used, high temperature, eye protection and other vital things required to solder and weld platinum are not required, working with this great tool is actually fun.
THE LASER
To begin, lets take a look what a Laser is. The word LASER is an acronym for Light Amplification by Stimulated Emission of Radiation. Rather than going into specific’s, lets just say that he laser is actually a mini spot welder, that creates a very precise beam and is capable of melting metal in an instant.
Because of the unique properties of platinum, welding can take place, without creating a large heat affected zone. So it is possible to weld very close to stones, enamels, pearls etc. Most welding can be done with the piece being held by hand.
As one looks through a binocular microscope, a cross hair aiming system places the beam in the precise position one is aiming for. The welding is done with a light pulse, controlled by a foot pedal.
THE PROJECTS
SANDWICH SETTING
The first project shown here is called a “Sandwich setting”. In this technique a Ruby is placed into a ring and held in place by welding a platinum bezel all around the rim.
The top bezel is being completely finished and polished. Surface texture is being applied to the bezel and the stone is sandwiched in place. To assure correct fit, the underside of the bezel has been ground to fit the crown of the stone.
As the stone is inserted, sometimes a little bit of super glue is used to hold the bezel in position for tacking. After the bezel has been tacked with the laser, the glue is chemically removed. The ring top has been filed all the way around at a 45 degree angle. This will create a groove once the bezel is placed on top. Using platinum filler wire of the same alloy, the bezel is now laser welded all the way around
After the welding is completed, the area is filed and polished and there is no visible seam. Also the stone has not been damaged by the heat of the welding.
The ring was hand held during the operation
TUBE STYLE MOUNTING
This project is called a “Tube Style Mounting”, as platinum tubing is being used to make the pendants frame. The stone used is an amethyst, the prepared platinum tube is Pt950/Ru
To make a modern pendant from this Amethyst, platinum tubing has been prepared to be used on either side of the stone. The tube has been split und has been opened somewhat to fit the stone sides.
The two platinum tube sections have been placed on either side of the stone and are secured with clear plastic tape.
Two platinum wires have now been welded to the bottom of the tube on either side of the stone. It is also necessary to attach the small piece of tubing that will be the bale for the chain to wear the pendant.
Once this welding has been done, the clear tape can be removed. To illustrate how little heat travels through platinum, it is pointed out that the plastic tape did not melt even though the wires were welded to the tube in close proximity
The wires were fully attached with clean welds on all sides. Then the wires were trimmed to be of equal length and the ends polished.
Using the laser the wires that make the under gallery are being attached. This is done to protect the stone by surrounding it with a wire protective cage
Once all is polished, the added nylon cord makes the pendant a stylish and fun piece of jewelry.
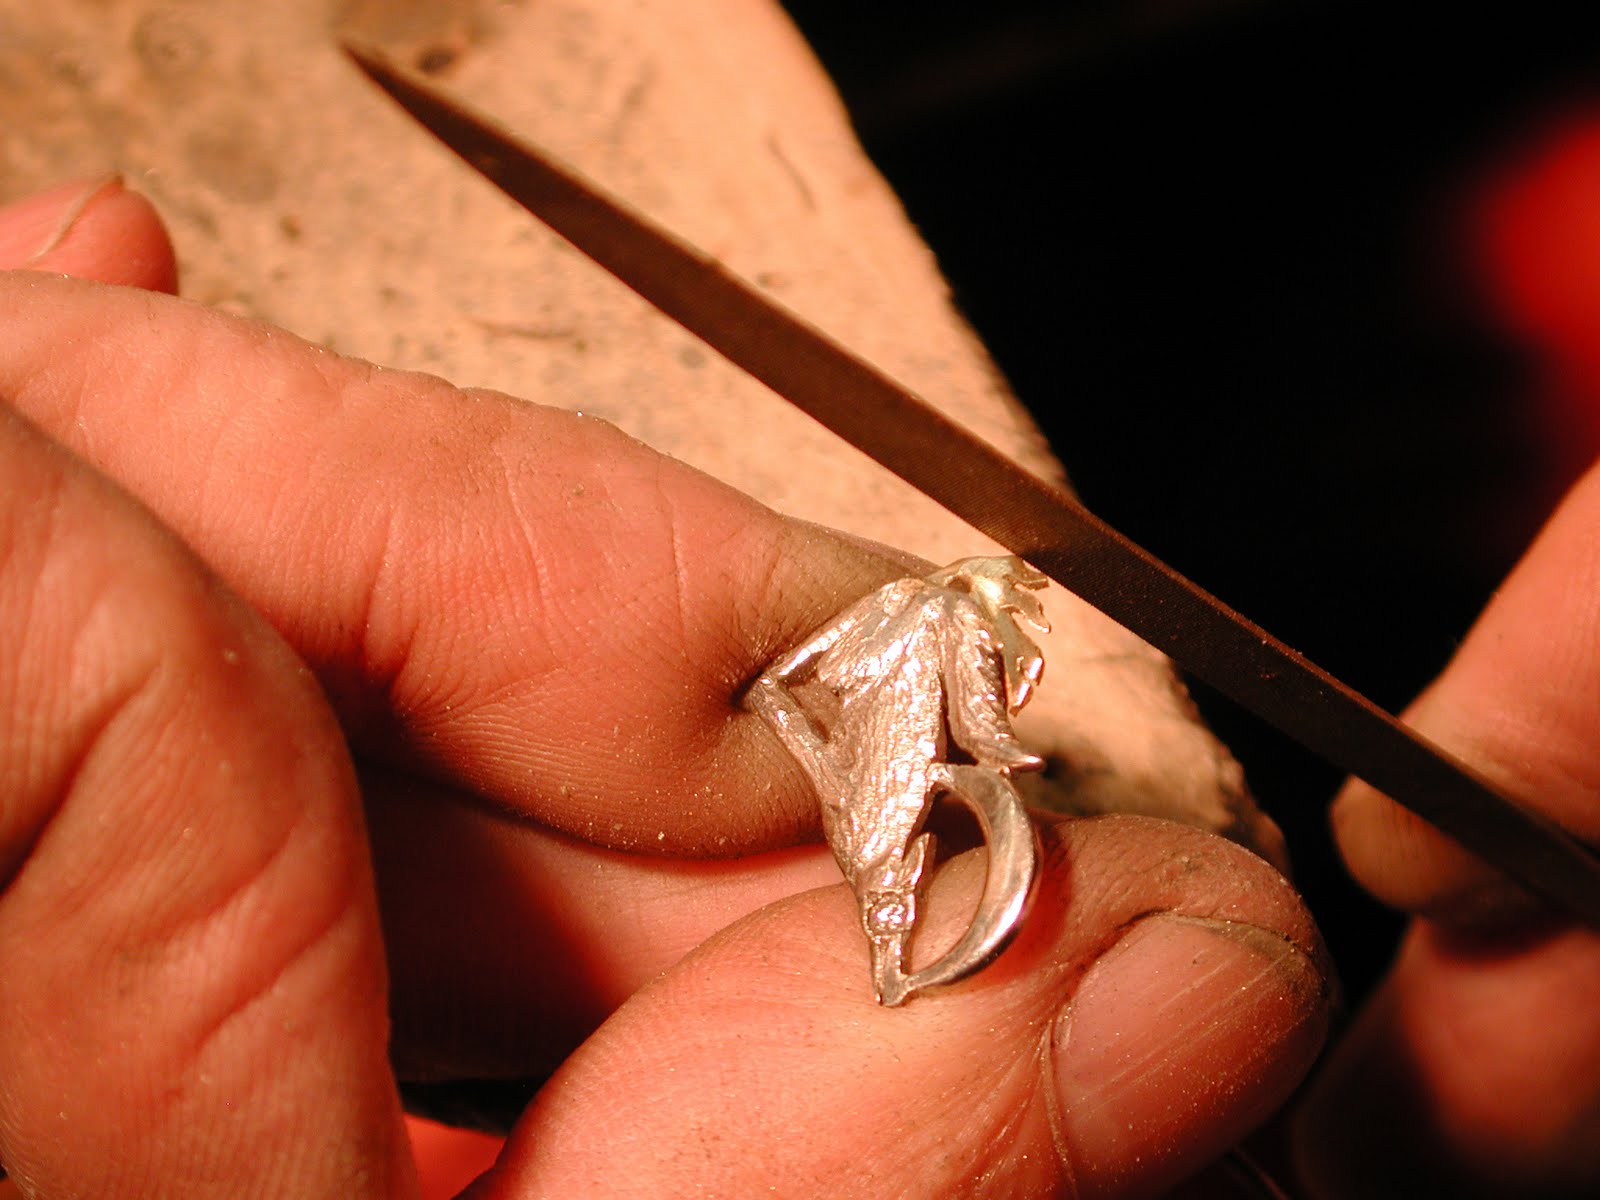
CAGE SETTING
This project is also fun do do. Using plain 1 mm Pt wire, a gallery is being formed, welded together and shaped to fit the stone. Two additional wires are bend in an L shape and welded together at the base to make the frame for this pendant
After these components have been assembled with the laser, a jump ring is attached to one of the wires to hold the chain.
After a light polish, the stone is placed into the mounting and held in place with a clear plastic adhesive tape.
Accurate trimming of the prong wires is necessary, so that the new wires that are being welded on top of the prongs are laying on the stone and the stone is tight.
After removing the plastic tape, the wires will be trimmed and polished. The attached cable chain adds to the beauty of the design.
MAKING HOLLOW SPHERE JEWELRY
This project is among my favorite ones. It combines skill and esthetics and the outcome are beautiful pieces, which are simple to make and are pleasing to the eye. They are also light weight, a really big plus with the high prices of precious metals these days.
The basic concept here is easy. Take a piece of light wood, such as Balsa, and shape it any way you like, into a bead, a heart, a marquise shape, any shape at all.
Now wrap thin platinum wire around the shape and weld it at every intersection, clip excess and add more until there is a geometric shape on the wood. Jump rings attached will be the place for the chain when completed.
After construction is completed, the wood is burned away and the hollow sphere is completed. Stones and rims can be added to make this truly beautiful.
It is possible to combine different manufacturing methods to do this. Here, sandwich setting was combined with the wire technique to include a diamond.
Another way to achieve this look without the wooden core, is to make a stabile frame of thicker wire and then wrap and weld the piece until it is satisfactory. It is important to know that wood is not the only core material. Candy (which dissolves in water) plaster, plastic, hard wax, etc. Just about any material that can be removed and withstand the laser, can be used.
MAKING A MULTI COLORED STONE RING
For this project, a plain tapered platinum band was used.
The goal was to set eight colored stones on the top of the ring, using platinum wire for prongs.
The stones were placed on top of the ring that was coated with sticky wax. This allowed the correct positioning of the stones on top of the ring. Using a scribe, the outlines of the stones were scribed into the ring top. After removal of stones and wax, the outlines were filled in with a colored pen for illustration.
Then the positions of the holes to be drilled were determined. The holes were drilled with a 1.1 mm twist drill, to hold 1mm platinum wire for prongs.
When drilling the holes, care has to be taken so that the holes do not cross, as they each need a wire that is inserted here to make the prongs. The holes were counter sunk from the back. This allows for extra space around the prong wire and guarantees a solid weld, as the extra space will be filled in with laser wire. At this time, the stones were laid out in the precise position on a piece of wax and the scratched images and colors were removed from the ring and the ring top was polished.
As the wires for the first stone were inserted, they were also welded from the back and the area on top of the ring around the prongs was completely re-polished and the stone was set.
This same procedure was followed with each stone: Insert the wire, weld, polish the top area and set the stone. This made a much cleaner ring top, as polishing is becoming increasingly more difficult as more stones are added.
The result is a handsome colored stone ring, which would have been difficult to make with a torch.
MAKING A MOON STONE NECKLACE
To make this moonstone necklace there were several challenges to be met. The stones had to be held with a single wire and the stones could not turn over when worn.
This was met by making a groove into each Moon stone using a diamond disc. A .7mm Pt wire was prepared by bending it around the stone and shaping it by bending the ends with pliers while the wire was in the groove.
A small jump ring was welded on one end and the wire was placed around the stone. The ends of the wire were held tight with a pair of pliers and tacked together with the laser. This once again is an operation that could not be done with a torch. The wire ends were then bend to form a small ring, cut to size and welded shot. The result was that the moonstone was surrounded by a platinum wire with a small ring on either end for connecting.
To make the connection,10mm long pieces of 3mm Pt tubing was prepared by cutting and drilling the ends to make the connections. The top of the drilled holes were counter sunk to allow for the welding wire to make a complete weld around the posts.
To connect the pieces, the tube connectors were placed over the rings on each stone and a short piece of wire was inserted. This wire was then welded to the top of the tube. This was repeated for all stones. After filing and polishing, the necklace was done. Using two lager jump rings, which were left open at the side, a simple slip on lock was created. The finished necklace was very flexible and the stones cannot turn over when worn.
RESTORING A 1920’s PLATINUM RING
This 1920’s platinum ring needed to be restored. Over 80 years of wear has left its marks. To begin with, the ring was made the proper size, This was done by removing a small amount of platinum from the shank and then using the laser to weld the seam. Then the individual prongs were being build up using filler wire made of the same platinum alloy as the ring
Additionally the facing of the head of the ring needed to build up, as over the life time of the ring a wedding band had been worn next to it and defaced the side.
After polishing and cleaning, the perfectly restored ring can be worn for many years to come.
CONCLUSION
I hope this presentation has provided a look at the ability a laser has and its importance in jewelry making. Lasers have unlimited potential and it is difficult to think where we would be without this tool. The price of this wonderful machine has reached the affordable and many jewelers can honestly say they could not afford being without one.
Credits
My special thanks to the people that have helped me put this paper together
Mr. Tom Rucker,
Sandwich Setting, Tube Style Mounting, Cage Setting and Hollow Sphere Jewelry
Mr. Roland Auer
Colored Stone Ring, Moon Stone Necklace
Mr. Gary Dawson
Restoring a 1920’s Platinum Ring